Tuesday, November 30, 2010

Thanksgiving


My pants are tight. 

My pants are already tight, as most are these days, 98% cotton and 2% spandex, denim masquerading as leggings. But this is different. And I'm not referring to the tightness of freshly washed jeans either.

Last year, the seat on my favorite pair of black pants split. Not from Thanksgiving stuffing but rather years and years of sitting and standing, sitting and standing, day in, day out. So, after months of slumming it in the bottom of my drawer, narrowly escaping the thrift store, into my suitcase they went for a little trip to my mother's sewing machine. 

In the days leading up to Thanksgiving my pants hung out upstairs over a chair back so as not to be forgotten. If they only knew what was going on downstairs.

When my friend Allison saw my mother's to-do list hanging over the calendar in the kitchen, beginning with 'Monday', she said a chill ran through her. In fact, my mother began preparing for Thanksgiving long before Monday. Over the summer she cuts sweet corn off the cob and freezes it for the corn pudding, and this year she decided to bake her own bread for the stuffing, she may have ground some of the grain herself too. I'm not kidding. But this is all done with joy, and everyone who comes to dinner brings many gifts as well, sweet potatoes, braised cabbage, wild rice pilaf, pickled watermelon rind, champagne, cheese, etc. It's only in the last half hour or so that there's a mad dash to get the salads plated, corn pudding and stuffing in the oven and turkey carved.

All the while my pants hung around upstairs, bored? Lonely? Or perhaps on edge? Maybe they could smell the metal and plastic sewing machine shrouded in a floral cover only several feet away. 

They should have run.

On the last day of our visit, when most of the leftovers had been eaten. My mother and I ascended the stairs to the sewing table and got to work. It was a quick procedure, find the black thread, load the bobbin, set the stitch, smooth the fabric. It was done in a flash and a half. And suddenly there they were again, good as new. My mother left and I slipped them on. Or rather, tugged them on. They used to be a little loose as I recall. They now groaned and stretched, hugging my hips with a fierce determination. 

Since returning to the city, Chris and I have been on a strict diet of greens and lentils with a little chicken thrown in, and I immediately pulled out my mother's old, wood handled jump rope. If I stand in our tiny room on an angle, I can just make a full rotation.

Lets just hope I don't one day lasso the flat screen and have some explaining to do.

Thomas Keller's Pearl Onions
Green Beans with Smoked Paprika and Almonds
Almond Slivers
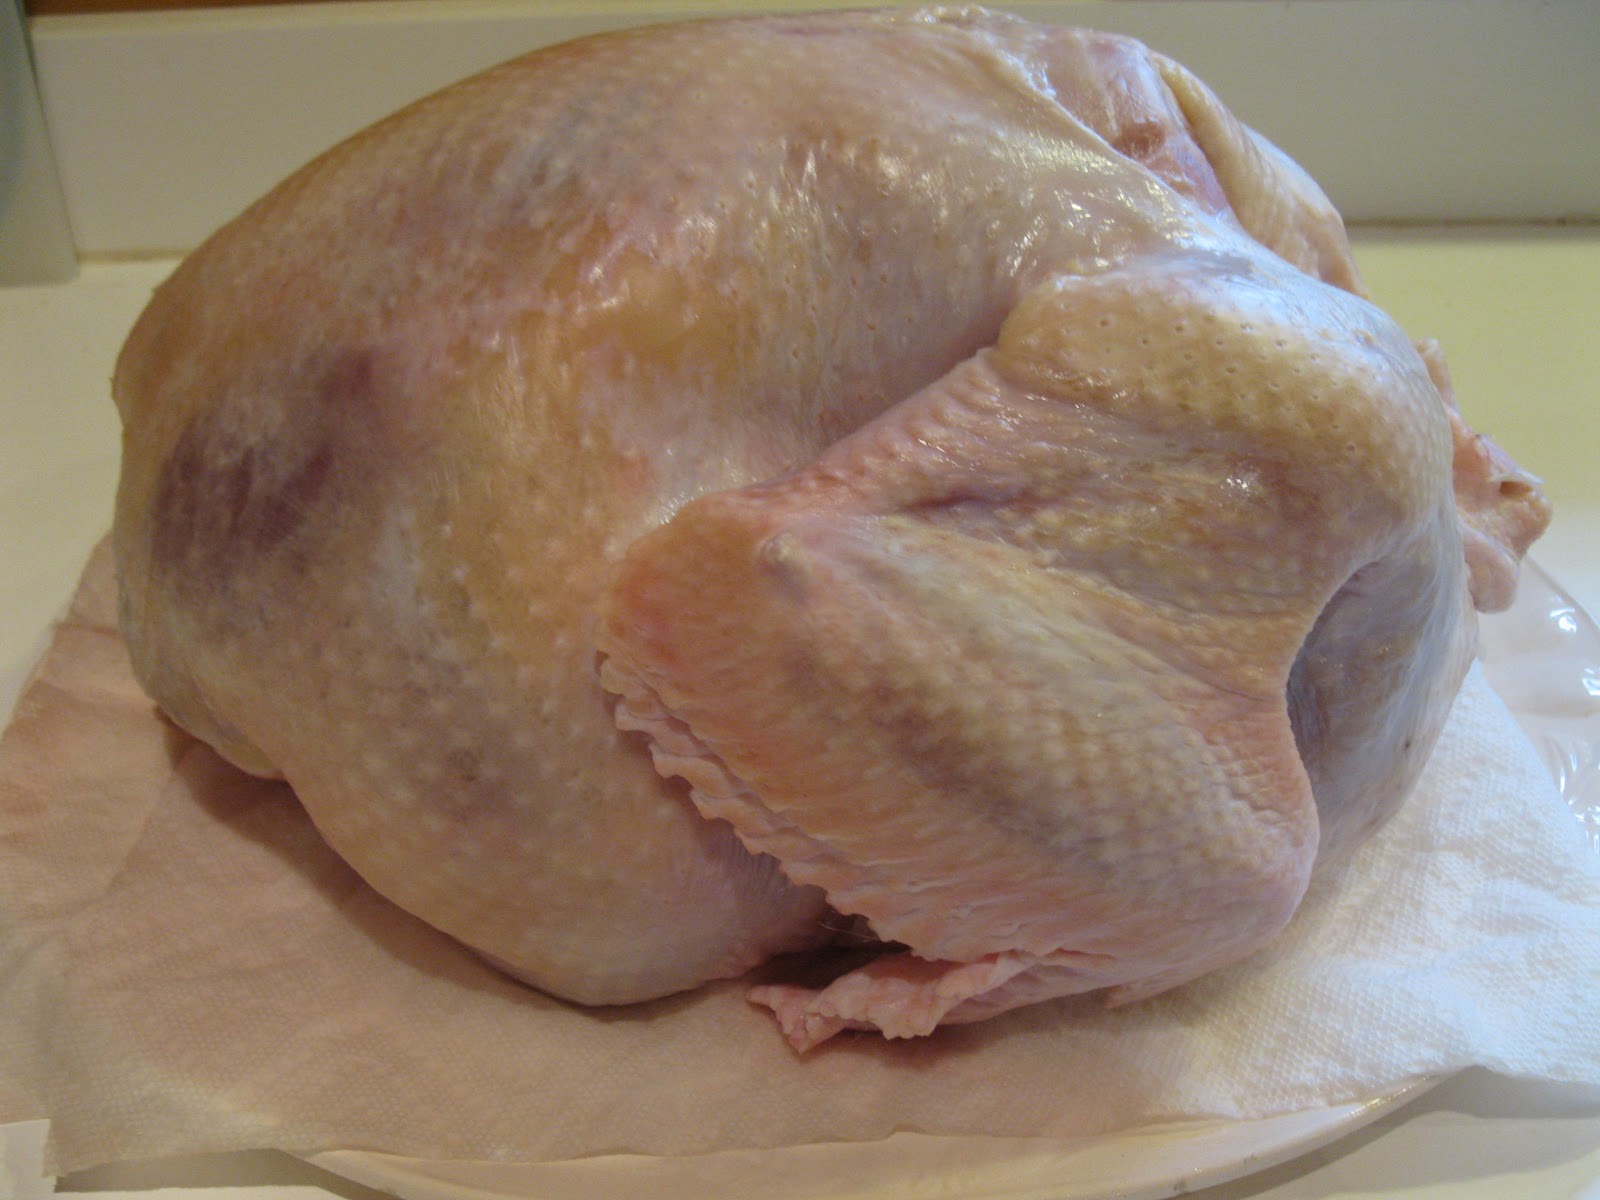
Turkey
Table
My Grandmother's Classroom Bell


Monday, November 22, 2010

Applesauce


The dog days of summer being long gone, I now turn on my toaster oven and electric skillet with reckless abandon. An open window whisks steam out into the cold night air, my hair no longer goes curly every time I cook, and at eight or nine at night whipping up some banana bread or applesauce seems like a natural way to end the day. I welcome the warmth.

Growing up in a log house only amplified the glory of fall and on chilly nights, there was nothing better than popping open a jar of my mom's homemade applesauce and getting to work with nutmeg and a grater. 

When it comes to store bought applesauce vs. homemade there is no comparison. One tastes like mealy, sugar-water and the other a rich sweet-tart snack. Applesauce is the easiest thing to make, it will impress your friends and is the perfect way to use up apples that have lost their crunch. I eat it for breakfast, lunch and dinner, but it's best still warm, straight out of the pot.


Applesauce


7 or 8 apples (smokehouse, winesap, macintosh or any good baking apple)
1/4 to 1/2 cup of water
a colander, strainer or food mill


Quarter and core the apples discarding all seeds but leaving the skins on (they add color and flavor). Put them in a pot (I used my rice cooker on the slow cook setting) add the water, cover and gently cook over a medium-low flame for anywhere between half an hour and an hour until the apples cook down and the skins begin to melt. Stir every now and then, you don't want the apples to burn. I like my applesauce a little thick so towards the end of your cooking time, uncover the pot to let some of the water cook out. Then, rest a colander or strainer or food mill over a large bowl and pour in the cooked apples. With the back of a ladle or a wooden spoon, begin to stir and push the apples through until only the skins are left. And now you have applesauce! It's delicious warm with a little grated nutmeg on top.


Sunday, November 7, 2010

Fresh Pasta from The Splendid Table


Last week, perhaps you watched it, Stephen Colbert did a pithy piece on Food Insurance. The Company's idea is this, if you find yourself to have survived the apocalypse, or some man-made or natural disaster, in which all sources of food and most of humanity and the animal kingdom are wiped out, you could have enough freeze dried food (depending on how wealthy you are) neatly packed into an emergency rucksack to last you and your family three weeks or up to a year! And after this freeze dried period is up, I guess the apocalypse will be over and nature reborn, so congratulations, you can resume your life as normal! Or you will just starve a long slow death wondering why you weren't just wiped out with everyone else. Anyone seen or read The Road?

And just in case you have any doubts, Glenn Beck endorsed it!

Forgive me for sounding morose but I think this is hilarious. After watching the segment in which Colbert quoted the Food Insurance website as saying, "While your neighbors are starving, you'll be dining on boef a la borgoignon," Chris and I were left reeling, and wondering what we might do in such a situation.

It's clear that Food Insurance is all about capitalism and nothing about survival. What if your rucksack of food blows up in this apocalyptic disaster but you don't? Can you get insurance on your food insurance? Will there be a claims center open during the apocalypse? Shouldn't we be more concerned with clean drinking water anyway?  And if your freeze dried food survives, won't the rest of your food? Looking at my shelves, I think Chris and I have enough to keep us alive for three weeks.

There is a shocking but somewhat true claim on the Food Insurance website which states "Also, some people believe that storing buckets of wheat and beans makes them prepared to live through an emergency. However, most people today don't know how to grind wheat let alone do anything with raw flour. Food insurance comes ready to eat. All you have to do is add water."


In some ways this is true. There are food banks that won't accept bags of flour because they claim noone knows what to do with it, and I think something must be done about that. We have fire and flood Insurance, car insurance and health insurance because it would be unreasonable to expect people to be able to perform the services provided by these companies, themselves. I'm sure there are very few people who can perform surgery on themselves, rebuild a water damaged house or repair a totaled car. But I don't think it's unreasonable to learn how to boil some beans or bake a loaf of bread.


Which is exactly what I'll be doing if a cataclysmic event strikes. If you are truly worried about how you will eat during such an event, educate yourself. You can check books out of the library on how to cook just about everything, and wilderness survival books that can teach what and what not to eat in nature. Lets give more jobs to librarians and less to CEO's. And if you've got some rice or a few carrots, come on over and we'll have a pot-luck. Just leave the freeze dried food at home. 


Because during the apocalypse, I'll be eating pasta till the eggs run out.


Egg Pasta from The Splendid Table by Lynne Rossetto Kasper

4 jumbo eggs
3 1/2 cups (14 ounces) all-purpose unbleached flour (organic stone-ground preferred)

Directions adapted from The Splendid Table

Making pasta is quite easy but if you're really interested in making it, I suggest picking up a good Italian cookbook and reading up on it. For now, I'll give some abbreviated directions below.

Since I don't have a lot of room, I halved the recipe and I mixed my eggs and flour with my fingers, in a bowl rather than on a large flat surface. To get started, pour your flour into a bowl or onto a clean countertop, make a well in the middle and crack your eggs into it. slowly start to mix the eggs with two fingers, gradually incorporating the rest of the flour until you have a mass of shaggy dough. Begin to form the dough into a cohesive ball and knead for 3 minutes. If the dough is too sticky add a little more flour. Then continue to knead for another 10 minutes until the dough becomes elastic and satiny smooth as Lynne describes. Then let the dough relax for 30 minutes to 3 hours wrapped in plastic wrap or, I just covered it with a bowl. You can skip this step if you're in a hurry. Then quarter the dough with a knife, keep three quarters covered and begin to roll out one quarter at a time.

If you have a pasta machine, follow the instructions on the machine for rolling it out and cutting it. If you don't, you can use a rolling pin to slowly roll and stretch out your dough and then cut it by hand. This is where an expert comes in, and any books by Lynne Rossetto Kasper or Marcela Hazan are great.

When your pasta is cut and shaped you can dry it out and it will last up to a week or you can toss it into boiling water while it's still fresh and in a few minutes you'll have delicious pasta. To prevent the pasta from sticking together after you've cut it, you can drape it over a chair back that's been covered with a clean dish cloth or lay it flat on a dish cloth.


Monday, November 1, 2010

Maida Heatter's Buttermilk Spice Cake


Maida Heatter didn't get her Book of Great Desserts inducted into the Cookbook Hall of Fame for nothing. While there is a time and a place for pulling recipes from the internet, when I'm looking for traditional recipes, I turn to the books. 

Maida Heatter reminds me of my grandmother and her desserts do too. Her cookbook is filled with classic recipes for devil's food cake, linzer torte, cream puffs, tea cakes, gingerbread and creme brulee as well as recipes that are very much of her generation like Irish coffee jelly, pineapple custard pudding, cream cheese and yoghurt pie, peace and plenty, caraway seed cake and Palm Beach Chocolate Tube Cake. 

Why don't we have desserts like these anymore?!

Since I got her cookbook, I've been dying to make her buttermilk spice cake. So, over the weekend I got all the ingredients together, halved the recipe and when I removed it from my toaster oven realized I had forgotten to halve the butter. Ooops. Let's just say it was very buttery.

So, still having some buttermilk, I decided to make it again this afternoon. I cut down on the sugar a little, correctly measured the butter and then forgot the lemon zest. Ai yai yai. So instead, I stirred it into the cream cheese frosting and I think I like it even better.

When Chris took a bite this evening he said it tasted just like fall. Yes it does.

Go out and vote tomorrow and then have a piece of cake!


Maida Heatter's Buttermilk Spice Cake (Maida Heatter's Book of Great Desserts, 1965)

To make your own buttermilk, warm 1 1/2 cups of regular (sweet) milk over low heat to room temperature (about 70 degrees). Place 1 1/2 tablespoons of lemon juice in a 2-cup glass measuring cup. Then fill it to the 1 1/2 cup line with the room temperature milk, stir, and let stand 10 minutes. Now you have 1 1/2 cups buttermilk.

3 cups sifted cake flour (I use King Arthur cake flour)
1 1/2 teaspoons baking soda
1 teaspoon salt
1 1/2 teaspoons cinnamon
3/4 teaspoon nutmeg
1/4 teaspoon powdered cloves
6 ounces butter
1 teaspoon vanilla extract
1 1/4 cups firmly packed light brown sugar
1 cup granulated sugar
3 eggs
1 1/2 cups buttermilk
finely grated rind of 1 lemon


Adjust rack one-third up from the bottom of the oven. Preheat oven to 350 degrees. Butter a 13 X 9X 2-inch pan and dust it all lightly with fine, dry bread crumbs (I just used flour).

Sift together flour, baking soda, salt, cinnamon, nutmeg and cloves. Set aside. In a large bowl of electric mixer beat the butter to soften it a bit. Add the vanilla and then, gradually, both sugars and beat for 1 to 2 minutes. Add the eggs individually, scraping the bowl as necessary with a rubber spatula and beating well after each. On lowest speed alternately add sifted dry ingredients in three additions and buttermilk in two additions, scraping the bowl with the spatula and beating only until smooth after each addition. Remove from mixer and stir in lemon rind.

Turn into pan and spread top level.

Bake 50 to 55 minutes or until the top springs back when lightly touched and cake begins to come away from the sides of the pan.

Let cake cook in the pan on a rack for about 15 minutes. Cut around sides to release. Cover with a rack or a cookie sheet and invert. Remove pan. Cover with a rack and invert again to finish cooling.


*notes
I halved this recipe to make one, 9 inch round cake and it turned out great (I'm guessing you could make the full recipe and divide the batter into two 9 inch round pans for a layer cake). It baked about 30-35 minutes at 350 degrees. I didn't have a mixer so I beat everything by hand and I made up a cream cheese frosting instead of the Brown Sugar icing recommended. And of course, I baked it in my toaster oven. I just kept an eye on it and after about 25 minutes of baking put a layer of foil on top to prevent burning. Also, I like to cut out a round of waxed paper to fit in the bottom of my cake pans after buttering and flouring.


Brown Sugar Icing

1 cup firmly packed brown sugar
1/3 cup heavy cream
2 tbs. butter
Pinch salt
1/2 tsp. vanilla extract

In a medium size saucepan, over moderately low heat, stir the sugar and cream to slowly dissolve the sugar, brushing down the sides occasionally with a wet brush to remove any sugar granules. Stirring constantly, slowly bring the syrup to a boil and let it boil for exactly one minute. Transfer to a small bowl of electric mixer. Add butter and stir to melt. Add salt and vanilla and beat until creamy and slightly thickened. It will still be warm. Immediately pour over the cake and, with a long, narrow metal spatula, spread to cover.

Note: Do not freeze this cake after it has been iced-the icing will become wet when thawed.

Friday, October 29, 2010

Blue Hill at Stone Barns


Last week I turned thirty. 

I have always looked forward to getting older but there was something about this particular birthday that depressed me. Not the number, I love that I'm through with my twenties. The problem was, I couldn't throw a party. Two is a party in the room Chris and I live in so there was no way I could spend a few days cooking wonderful little dishes and invite people over for food and a good time unless we did it in shifts, and that's no fun. And every restaurant or bar I thought of had so many restrictions, weird owners or expensive drinks, I couldn't be bothered. So over the course of the week I celebrated here and there with family and friends, was thoroughly spoiled with kitchen related items, and that was that.

However, Chris being the wonderful husband that he is, had picked up on a little hint I'd dropped a few months earlier, that wouldn't it be nice to have a meal at Blue Hill at Stone Barns.

Holy Shit.

If you have never been, you should go, and if you've been, how long did you wait before you went again?

Blue Hill at Stone Barns is Dan Barber's restaurant located right on the Stone Barns farm, a sprawling 80 acre farm 25 miles north of Manhattan. The farm provides educational outreach and a farmers market to the public, and the restaurant sources all of it's ingredients from Stone Barns farm, Blue Hill farm (Dan Barber's farm up in Massachusetts) and other local, Hudson Valley farms. This place is a locavore's dream.

I didn't take pictures of the food because I find that to be a little like texting while driving. This is the kind of meal you save up for and only have every few years, if that, so I snapped as many pictures as I could right before the first amuse bouche arrived and then let myself be whisked away into a food wonderland.

I will try to describe the whole meal we had. But it's almost impossible. So I'll breeze through in hopes of whetting your appetite because if you like food, and I'm guessing you do, you just have to go experience the restaurant for yourself. 

I think my thirties are off to a good start.


There is no menu at Blue Hill at Stone Barns, instead you get to choose between a six course or an eight course Farmer's Feast of local and seasonal ingredients. Chris and I chose the eight course meal and told our waiter we had no restrictions, meaning we would eat whatever they put in front of us.


We were very hungry when we were seated at 5pm and I'm not sure if the wait staff picked up on that but we were presented, one by one, with seven or eight different amuses bouches; fennel soup, vegetables on a fence, salsify with panchetta, pork terrine with chocolate, thinly sliced cured pork with parmesan crisps, grilled snow peas, kale chips, veal bone marrow with bread crumbs and I know I'm forgetting a few more. Halfway through, Chris wondered if we were already on the fourth or fifth course and would we still be hungry after the meal? I gently pointed out that they had not even begun the courses. This was just the seduction. 


Because Stone Barns is foremost about education, the staff at Blue Hill at Stone Barns incorporates that into the meal. So in between courses someone would arrive with a basket of eggs and talk about the chickens, or a platter of charcoal made from pork and veal bones, corn cobs and wood from felled trees, and describe how their flavors had infused the soup we just ate. There was never a dull moment and I mean that in the best possible way.


Our first course was a plate of thinly sliced beets, briefly pickled in herb infused vinegars, sprinkled with toasted pine nuts and grated with egg yolks that had been cured with salt and sugar. The second course was a smoked tomato soup that was poured over a bowl, cradling small spoonfuls of caviar, wild mushrooms, plums, a parmesan crisp and something else. By this point I gave up trying to remember everything. The soup was heaven. The third course was the most flavorful piece of wild sea bass I've ever had, nestled in a bowl of pea shoot puree. 

Everyone gets an egg at BHSB and the fourth course was a slow poached egg, rolled in bread crumbs and lightly deep fried, resting pastorally on a bed of slivered beans with a smear of sweet potato puree on the side of the bowl with a finely sliced chicken heart on top. Before the next course arrived we were presented with a basket of piping hot potato and onion bread, perhaps some of the best bread I've ever had in my life, with a small stick of fresh butter and two flavored salts, one shitake and one tomato to accompany it. 

The fifth course was a butternut squash pasta with a smear of balsamic reduction. We were getting quite full. And the sixth course, which just about killed both of us, was a piece of fatty lamb's neck on a bed of vegetables. Dan Barber wrote a wonderful article about cleaning your plate, which I had done with every course up until now. I wanted to eat that lamb's neck like nobody's business but my body was saying, no more! And so I left half on my plate. 

And then came dessert.


The seventh course, which was quite refreshing, was a trio of small glass cups. One cup had a spoon of greek yogurt sitting on blueberry compote, sprinkled with granola. The center cup was utterly divine, a pear sorbet with a honey and eucalyptus granita on top, and the third was a barely sweet concord grape jelly with a spoon of fromage blanc ice cream. Finally, the eighth and last course was an apple cake with a soft meringue on top for each of us and a slice of dark bitter chocolate cake with a spoon of apricot sorbet to share. We could only taste the final course we were so full. And then they brought a plate of maple fudge and dark chocolate, and after that a plate of concord grapes, honeycomb and more fudge and dark chocolate. Throughout the meal we had wine and some coffee to finish.


Chris and I were giddy the whole time, I felt utterly spoiled and now I'm dreaming of what spring must taste like on the farm. Thanks hon, I'll have to take you next time.


Tuesday, October 19, 2010

Bright Vegetarian Chili


I think food should look as good as it tastes. And if it doesn't taste good it might as well look good. But food that looks awful and tastes wonderful is a crying shame. And food that looks awful and tastes awful is unfortunitley in the majority.


This is how I feel about most bowls of chili. I can respect a beef chili that requires ample stove time, allowing the meat to fall apart and melt between your teeth but when it comes to vegetarian chili most bowls I come across are a uniform brown with barely recognizable, mushy vegetables. 


I was in a friends home last week and noticed a pot of chili he had made that was bright, cheerful and delicious, an autumnal burst of color in a bowl, probably the result of needing to get dinner on the table fast, and it was absolutely brilliant. It flipped my idea of chili upside down. 


So, with the constant sound of baseball and football crowds cheering in the background and a briskness in the air, this past weekend I threw a few things in a pot, and about half an hour later had a mean chili that is as pretty as it is good. Let it refrigerate overnight and it gets even better. Tortilla Chips, some nice orange cheddar, sliced avocado and a cold beer and I almost don't care who wins the game. Almost.


We are in Chili season after all, which I'd say starts with October Baseball and ends sometime after the Super Bowl, and if you live in the city like me and are dying to jump in a pile of leaves, this gets pretty close. 


Bright Vegetarian Chili


2 tbs. olive oil
1 large yellow onion, finely chopped
2 cloves garlic, minced
1 tbs. tomato paste
1 tsp. cayenne
2 tsp. paprika
1/2 tsp. ground chipotle chili
small pinch bhut jolokia (optional)
2 tsp. whole cumin seeds
1 large carrot, quartered lengthwise and sliced into 1/8" pieces
1 red pepper, sliced into 1/2" strips and chopped into 1/2" pieces
1 14.5 oz. can of crushed tomatoes with liquid
3/4 cup vegetable broth
1 eight oz. can organic kidney beans, drained and rinsed
1 eight oz. can organic barlotti beans or pinto beans, drained and rinsed
salt


Heat the olive oil over medium heat, add the onions and saute for about five minutes. Add the garlic and cumin seeds, cook a few more minutes until fragrant. Then add the tomato paste and evenly coat the onion and garlic. Add the cayenne, paprika, chipotle and bhut jolokia, continue to stir until well combined and then add the carrots and peppers, saute for 10 minutes. Then add the tomatoes with their liquid, the beans and about 1/2 cup of vegetable broth. Cover and cook another 10-15 minutes just until the carrots are tender but still have a little bite. Add more broth if too dry and a pinch of salt if needed. Serve immediately.


*note
I didn't actually measure any of the spices as I made this so I've approximated them in my recipe. Feel free to tinker, this version has quite a kick.


Saturday, October 16, 2010

Padma Lakshmi's Spiced Candied Pecans


There is a dog I know. A beautiful golden retriever who will stop traffic as she lays flat on the sidewalk in submissive longing for a belly rub or a sniff. Hearts soften, small yappy dogs grow quiet and entranced children gently stroke her silky coat until I grow impatient and tug her to her feet.

But this dog also has an insatiable appetite. Food: her reason to live. She has eaten my entire sandwich, dragged leftovers from the garbage, pulled cookies off the counter, and stared me down at every meal. And once we engaged in an epic and rather loud struggle over a giant, rotten chicken bone as I knealed on the filthy curb, my fingers slick with dog slobber, trying to pry chicken bits from her clenched teeth. Oh yes, people stopped and stared. Even the jaws of life would have been useless, Maggie was victorious from the start, and all I could do was sigh as she swallowed a huge mouthful of gristle and bone, completely oblivious to what I knew would be a rough morning for her the next day. She was immensely pleased.

These spiced maple pecans are like Maggie's chicken bones to me. I will eat them until I get sick and just try to pry them from my fingers. Make them but don't tell anyone, or if you do, make double. Slice a good apple, pour some good whiskey and If you have a dog, you'll definitely want to tie them up.

Spiced Candied Pecans from Padma Lakshmi's Tangy, Tart, Hot and Sweet

One cup whole pecans
1/4 cup maple syrup (I like grade A dark amber)
1/4 tsp. chili powder

Preheat the oven to 375 (a toaster oven works great). Line a baking sheet with aluminum foil. Arrange the pecans on a baking sheet in a single layer. Try to keep the individual nuts from touching each other. In a small bowl whisk the chili powder and maple syrup together with a fork. Now drizzle the syrup over the pecans. Try to coat the nuts completely by sliding them around on the baking sheet so all the syrup is used. Place in the oven. Bake for 10 to 12 minutes, until the syrup has just begun to brown or blacken; don't let the nuts burn. Remove and immediately arrange the pecans on a dish, making sure they do not touch one another; if you leave them in a pile they will cool into a brittle.

*note
I just mix the pecans, syrup and cayenne in a bowl and turn out onto the baking sheet, and I cool the nuts on a Silpat by an open window.